Salt, Slate and Scenery: Turning UK Beach Finds into Tabletop Terrain
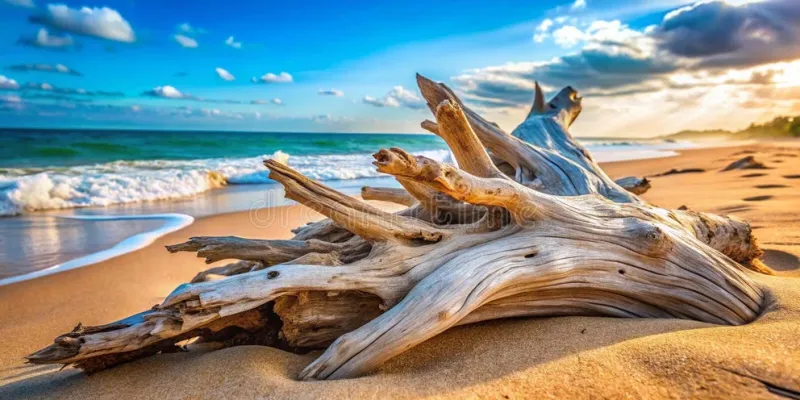
Photo: driftwood slate shells sea glass tabletop terrain UK beach, via thumbs.dreamstime.com
A good beach walk gives you more than sea air and a soggy sandwich. It gives you a bag of driftwood, a few flat slate pieces, some weathered shells and a pocketful of sea glass. For a tabletop hobbyist, that is not litter. That is a scenery kit waiting to happen.
But before you fill your rucksack, there are rules. UK beaches are not a free pick-and-mix. Some are protected, some are privately owned, and some have bylaws that specifically ban removing sand, shingle or pebbles. Forage lightly, forage legally, and leave the coast as you found it.
The rules of the strandline
Start with designations. Sites of Special Scientific Interest, Marine Conservation Zones and local nature reserves often have strict rules about removing anything, including driftwood and shells. Check the local council's website or the landowner's signage. If in doubt, take photographs instead of rocks.
Some beaches are famous for a reason and should be left alone. Chesil Beach is a shingle barrier under heavy protection; taking pebbles is not a victimless crime. The same goes for sea defences, harbour walls and anything that looks like it is holding the coast together. Do not prise live limpets or barnacles off rocks. Do not take birds' nests, egg cases with something still inside, or driftwood that is clearly part of a sea-defence structure.
Take small amounts. A few pieces of driftwood, a handful of slate, a couple of shells. You are making a wargaming table, not opening a quarry. Wear gloves, check tide times, and avoid cliffs and mudflats. A cloth bag is better than a plastic one — it lets wet finds breathe and stops everything turning into a salty soup.
What to pick — and what to leave
Driftwood is the star. Look for small, sound pieces with interesting shapes: forked branches, worn posts, knotty stumps. Avoid anything soft, crumbly or full of nails. Old treated timber can be nasty to cut, so leave it on the beach.
Slate is brilliant for rocky outcrops and cliff faces. Thin, flat pieces are easy to stack and base. Shale and flint can work too, but slate gives you that dark, layered look with very little effort. Shells bring scale and texture — cockles, winkles, mussels and oyster shells are all useful. Sea glass adds colour without looking artificial, especially the frosted green and white pieces.
Leave anything alive, anything that smells like it is still decomposing, and anything that would leave a hole in the beach's natural armour. If a piece is too big to carry comfortably, it is probably too big for a skirmish board anyway.
Cleaning, drying and sealing
Salt is the enemy of paint, glue and metal figures. Soak your finds in fresh water for 24–48 hours, changing the water once or twice. Scrub with a stiff brush and a little washing-up liquid. Rinse well, then dry thoroughly.
Driftwood needs slow drying. A warm, dry room for a week is better than a radiator, which can crack it. If you are worried about insects, a low-temperature oven on a very low setting can help, but watch it carefully — wood and ovens are not always friends. Seal driftwood with a 50/50 mix of PVA and water, or a matte varnish. Wood hardener is useful for soft, punky pieces.
Slate just needs a scrub, a dry and a coat of matte varnish. Shells can be washed in soapy water; if they still smell, a weak bleach solution followed by a very thorough rinse will sort them out. Sea glass only needs warm soapy water. Seal everything with matte varnish before you paint or base it. An airbrush makes light work of this — a thin coat of matte varnish through the airbrush gives you a uniform finish without clogging detail.
Build one: the driftwood gantry
A ruined gantry or pier makes a great centrepiece for a 28mm skirmish board. Pick two chunky driftwood posts and a few thinner crosspieces. Base them on cork or MDF, then add decking from balsa or plastic card. Leave a gap or two so it looks collapsed. Spray the wood with a grey-brown primer, then drybrush pale grey and add rust pigment around any 'metal' parts. A little static grass at the base and you have a piece that tells a story: the sea took the rest.
Build two: the slate outcrop
Stack flat slate pieces into a layered outcrop. Start with the biggest at the bottom and work upwards, gluing with PVA or superglue and accelerator. Fill the gaps with texture paste, then base the whole thing on a piece of cork. Prime grey, drybrush lighter grey, and add a few patches of green static grass and moss. This is ideal for a coastal cliff edge, a rocky pass or a line-of-sight blocker that still looks natural.
Build three: shell tide-pool markers
Use shells as objective markers or scatter terrain. Glue a few shells onto 40mm bases, add a little sand and tiny sea-glass chips, then seal with gloss varnish for a wet look. A thin layer of UV resin can suggest standing water, but keep it shallow and work in a ventilated space. These markers are quick, cheap and instantly readable on the table — especially for a beach-landing scenario.
Packing it home
Wrap wet finds in newspaper and keep shells separate from wood. Label the bag with the beach name and date if you plan to repeat the trip. Rinse your hands, check your pockets for anything that wriggles, and leave the beach tidier than you found it. Cut, spray, build — and let the coast do some of the design work.