Four Sundays, One Hygrometer: A Wet-November Airbrush Log from a Spare Room
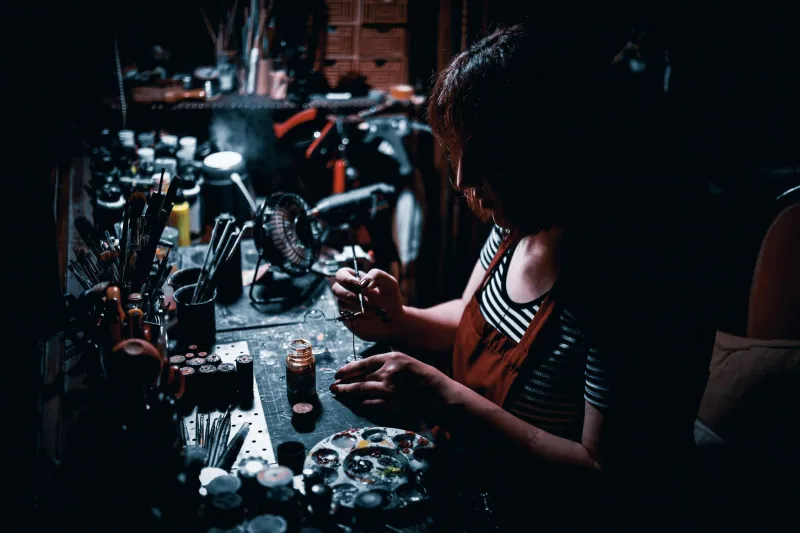
November in a spare room is less a month than a slow negotiation with water. I started this log on 13 October 2026 and finished on 9 November, which gave me four Sundays of ordinary UK weather: wet pavements, a radiator that clicks like a pensioner's knee, and a kettle that adds a surprising amount of moisture to the air. The aim was simple. Watch the bench, spray some spoons, and work out what actually changes when relative humidity drifts.
This was not a laboratory test. I used a cheap digital hygrometer, a thermometer, twelve plastic teaspoons, one grey primer, one mid-grey acrylic, a bottle of superglue and a lot of masking tape. The bench is in a typical spare room: roughly 2.8m by 2.4m, one window, one radiator, a door that stays shut during airbrushing sessions and a extractor fan in the bathroom down the hall. Very glamorous.
The bench and the kit
I took readings at three points in the day: about 9am, 2pm and 8pm. The hygrometer sat on the bench, away from the window and radiator, at the same height as my spray booth. I noted room temperature too, because relative humidity means very little without it. The test spoons were primed in one batch, left overnight, then taped and scratched to see how well the primer had gripped. For the acrylic test, I thinned to my usual milky consistency and sprayed a light coat across each spoon. For superglue, I used small beads on scrap plastic and timed how long they took to stop being tacky.
Week one: the window wins
13 to 19 October was mild and damp. The bench hygrometer read between 64% and 71% relative humidity for most of the week, with the room sitting at 19–21°C. The window was the main culprit. Even with the frame shut, the glass ran with condensation in the mornings and the area closest to it felt cooler and clammy.
The acrylic behaved reasonably well, but it needed an extra drop of thinner to stop it drying in the nozzle between passes. Primer was fussier. On two spoons the primer looked fine wet, then dried with a slightly grainy edge where I had sprayed too far from the surface. The tape-pull test removed a small patch from one spoon, which told me the primer had not keyed as well as it did in drier weather. Superglue was noticeably slow. A bead that normally sets in seconds stayed tacky long enough for me to start rearranging the bench, which is never a good sign.
Week two: rain, kettle, condensation
20 to 26 October was wetter. The bench ranged from 68% to 76%, with the worst readings on the evenings I had boiled the kettle and then pottered about with the door open. Temperature stayed around 18–22°C, but the air felt heavier. This was the week where the spare room reminded me that humidity is not just a outdoor problem. Cooking, drying laundry on a radiator and even a long shower can push moisture around a small flat.
The spoons from week two showed the same pattern in a slightly louder voice. Acrylic went on fine in thin coats but dried with a faint blush on one spoon, especially where I had layered it quickly. Primer grip was patchy on the spoon I had handled with bare fingers, which is a useful reminder that skin oils plus damp air are a double act. Superglue was the real sulker. It eventually cured, but the joints felt weaker and one scrap piece popped apart with modest pressure. If you are building resin kits or small terrain pieces in this kind of weather, give cyanoacrylate more time than you think it needs.
Week three: heating on, air off
27 October to 2 November brought a cold snap and the heating came on properly. Indoors, the hygrometer dropped to 55–62% at the bench, which sounds like a victory until you notice the local microclimate. The corner by the window still read a few points higher, and the radiator created a warm, dry-ish layer at bench height while the floor stayed cooler. Airbrushing felt easier. Acrylic thinned predictably, primer grabbed better and the tape-pull test was much cleaner. Superglue snapped back to its usual impatient self.
The downside was dry-tip behaviour. With the heating on and the room warmer, acrylic wanted to skin over in the nozzle if I paused to think about life. I started adding a little flow improver rather than more thinner, and kept a damp cloth handy for wiping the needle between colour changes. Primer liked the drier air, but I still sprayed light passes rather than one heavy coat. The test spoons from this week were the most consistent of the four.
Week four: the see-saw
3 to 9 November was back to wet weather, with the bench bouncing between 64% and 73%. The radiator cycled on and off, which meant the humidity reading moved around more than in previous weeks. This was the most realistic test of all, because most UK hobby rooms are not stable climate chambers. They are spare bedrooms with a window, a radiator and a door that lets in whatever the rest of the house is doing.
Acrylic needed small adjustments rather than dramatic ones. I mixed slightly smaller batches and accepted that a second drop of thinner was sometimes necessary. Primer grip was decent but not perfect on the spoons left near the window overnight. Superglue was slower again, especially on larger beads. The lesson was not that November is unworkable. It was that the bench has a weather report of its own.
What the spoons said
Across twelve spoons, the pattern was consistent enough to be useful. Damp weeks meant slower superglue, slightly weaker primer adhesion and acrylic that needed more careful thinning. Drier heated weeks meant better primer grip but a faster-drying acrylic that could tip-dry if I dawdled. The worst results came from sudden changes, not from any single reading. A spoon primed on a damp evening and left by the window did worse than one primed in the same week but kept in a sealed box.
| Week | Bench humidity | Room temp | Bench note |
|---|---|---|---|
| 13–19 Oct | 64–71% | 19–21°C | Primer needed light passes; superglue slow |
| 20–26 Oct | 68–76% | 18–22°C | Patchy primer grip; acrylic blushed once |
| 27 Oct–2 Nov | 55–62% | 20–23°C | Best overall; watch dry-tip |
| 3–9 Nov | 64–73% | 19–22°C | See-saw readings; small mixes helped |
The renter-friendly stabilising plan
You do not need to modify the room to make this better. Start with a cheap hygrometer and keep it at bench height, not on the floor or against the radiator. Move the bench a little away from the window if you can, and keep paints, primer and superglue in a lidded box with a couple of silica packets. That will not fix the room, but it gives your materials a steadier home.
For the room itself, use a small dehumidifier or crystal damp trap near the bench, especially on wet weeks. Keep the door closed while spraying and open it afterwards to let the room breathe. If you have a trickle vent, use it instead of flinging the window wide open in the rain. Wipe condensation off the glass in the mornings so it does not sit there adding moisture back into the air. A tray under the spray booth catches drips and makes cleanup easier.
As the heating goes on, avoid putting the bench right beside the radiator. Warm, dry air is helpful, but direct heat makes acrylic dry in the nozzle and can warp delicate parts. Use a timer or thermostat setting that keeps the room comfortable rather than tropical. Mix smaller batches of paint, keep the needle clean and test on a spoon before committing to a kit. If the hygrometer reads above 70% at bench height, assume primer and superglue will need more patience. If it drops below 55% with the heating on, watch for dry-tip and add flow improver rather than thinning too much.
The short version
November is not a write-off for UK airbrushing. It is a month for small adjustments. Keep a hygrometer on the bench, store your materials in a sealed box, move away from the window, and let the heating do its job without baking the paint. The spoons will tell you more than any internet chart. And if the superglue seems to be thinking about it, give it another minute before you blame the bottle.